
Introduction
Laminate flooring is convenient and a good choice of floor used in modern interiors because it is not only durable and affordable, but it is also easy to maintain. But proper installation is critical in ensuring a smooth and long-lasting finish. A lot of home-owning people are preoccupied with beauty and neglect the preparation and planning, which may cost them a lot in the future. This guide answers the most commonly asked question, “how to install laminate flooring,” and simplifies the laminate flooring installation into manageable tasks that are easy to understand at each phase, so that you know what is really important at each phase to achieve a professional-level outcome, from preparation to finishing.
Laminate Flooring Installation: A Step-by-Step Process
The laminate flooring, when properly installed, gives durability, visual consistency, and performance. Misplaced techniques may lead to buckling, hollows, noises, or untimely wear. The proper procedure is the method of safeguarding your investment and increasing the comfort and aesthetics in the space. Correct installation helps:
- Avoid the damage caused by expansion.
- Maintain plank alignment
- Improve floor lifespan
- Get a smooth professional finish.
Let’s get started:
- Step 1: Acclimating the Laminate Flooring
Laminate planks should be allowed to acclimate to the environment of the room before they are installed. Installation requires storage of unopened boxes in the installation space for 24-48 hours. This will enable the material to adapt to temperature and humidity so that there will be no problems of expanding and contracting or warping in the future.
- Step 2: Prepare the Subfloor
Laminate flooring requires a clean, dry, and level subfloor. Eliminate dump, nails, and pastes. See whether there are any areas that are not level with the help of a level and fix dips or upraises to prevent squeaking, gaps, or loose planks after installation.
- Step 3: Installing the Underlayment
Underlayment offers protection against moisture, sound, and comfort. Lay it so smoothly on top of the subfloor without any overlaps. Sewing Tape seams. Tape the material and cut the excess. You should always ensure whether you need underlayment or not with your laminate flooring, depending on whether it has one attached.
- Step 4: Plan the Floor Layout
The appearance and efficiency are enhanced through planning the layout. Laminate flooring is normally fitted in a direction parallel to the longest wall or light source. The initial row should be dry-fitted so as not to have narrow planks on the edges and so that it has a balanced and symmetrical finish.
- Step 5: Leave Expansion Gaps
Laminate flooring is prone to expansion and contraction with the change in temperature. Provision of spacers to leave a 1/4-inch expansion gap between walls, door frames, and fixed objects. Failure to do this may lead to buckling or lifting after the floor acclimatizes to the environmental conditions.
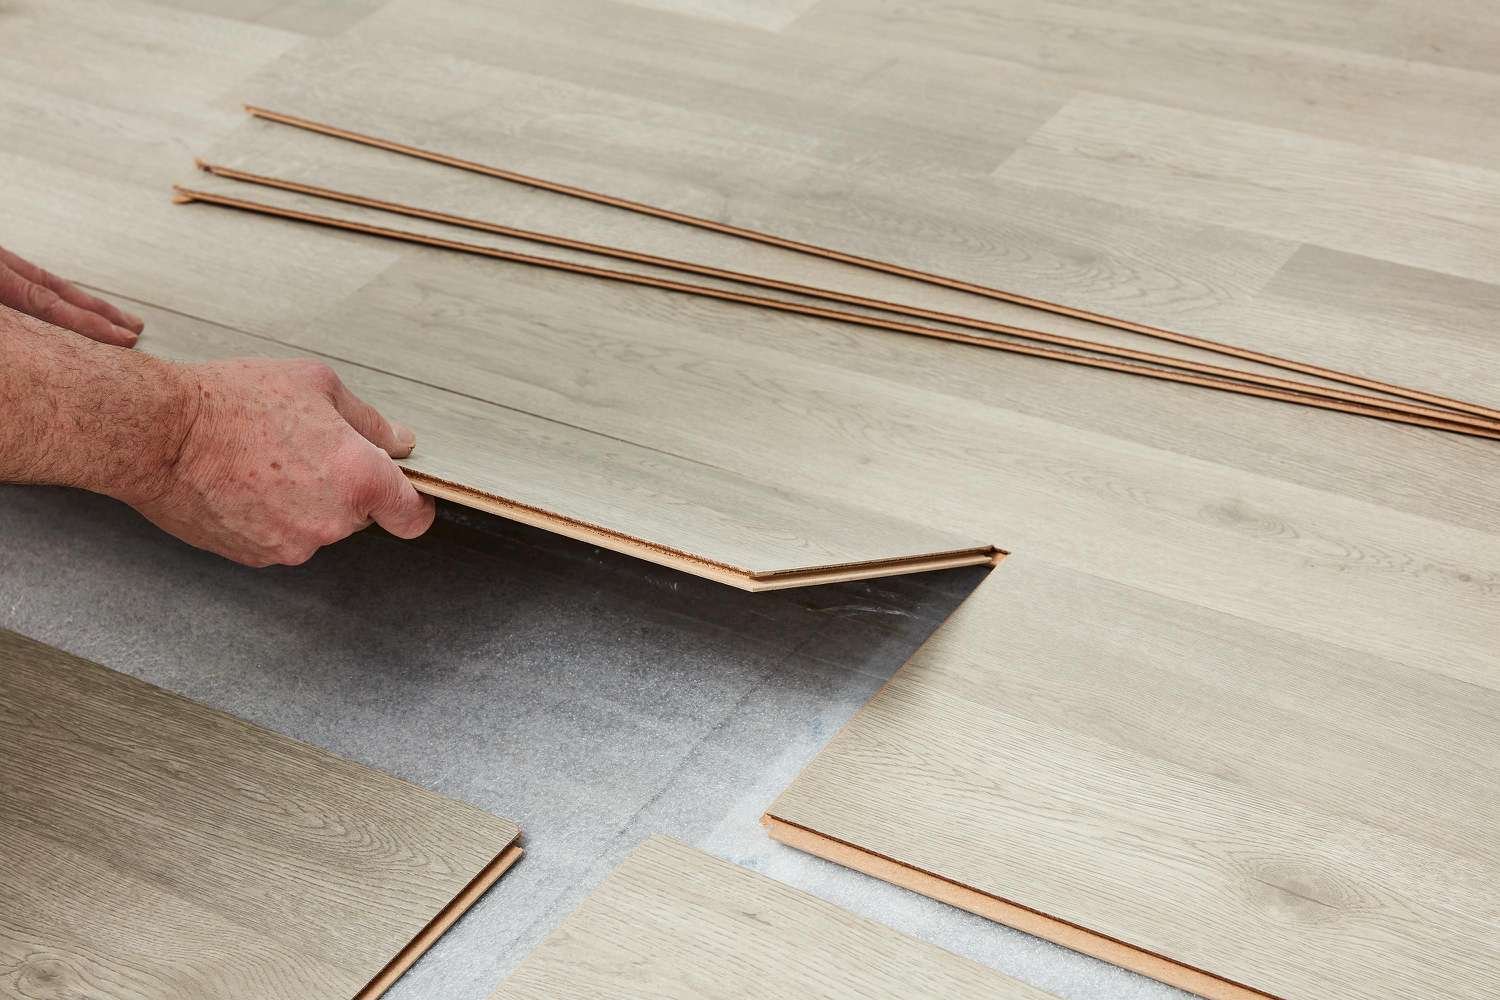
- Step 6: Install the Planks
Installation should start at one end and move in a row-by-row fashion. Apply the click-lock system, which means angling planks and fixing them together. The staggered joints should be placed at least 12 inches apart to enhance the structural strength and flow.
- Step 7: Cut Around Obstacles
Pipes, door frames, and vents need to be cut very precisely. Cutting the planks with a jigsaw or a circular saw needs to be measured properly beforehand. The use of clean and accurate cuts will make the floor look seamless, and the flooring will be snug enough without hindering natural movement.
- Step 8: Install the Final Rows
The last rows may need special equipment because of the lack of space. Planks should be clamped with the help of a pull bar without breaking edges. Be particularly careful here, because wrongly installed in tight places, it may have an impact on the whole stability of the floor.
- Step 9: Add Finishing Touches
After installation has been made, it should be followed by the removal of all spacers and the application of baseboards or quarter-round molding. Always fix a trim on the wall and not on the floor so that it moves up and down. Clear the surface of dust and debris.
Conclusion
Laminate flooring is an activity that has achieved success upon installation based on patience, planning, and attention to detail. Every step is involved in the final leaving; hence, proper acclimation and subfloor preparation, layout, and finishing are all important aspects. Laminate flooring is also durable in the long term, aesthetically pleasing, and comfortable to use on a day-to-day basis when installed properly. Homeowners and professionals can get a clean, reliable floor by adhering to a systematic installation procedure that increases functionality and design.
FAQs
Is it possible to install the laminate flooring over tiles?
Yes, in case the tiles are flat and stable.
How long does it take to install laminate flooring?
It usually takes around 1 to 2 days to completely install laminate flooring.
Is laminate flooring able to absorb moisture?
It is not waterproof, but it is moisture-resistant.